iCADdocs_online
iCAD and Related Products Setup and Licensing
Welcome to iCAD, and Thank you for choosing to use it. This small guide will assist you to get your software up and running.
Table of Contents
- Introduction
- System Requirements
- Installation and setup guide
- Updating Your Product
- Regular License Check
- Setup AutoCAD for use with iCAD and related products
- Installing Update resources
- Licensing Guide
- Enabling VBA for AutoCAD
Introduction
- Enabling VBA for AutoCAD
iCAD is a unique software that can significantly and positively impact how you work and deliver your projects. Although iCAD is designed to be easy to use and intuitive, a minimum guidance is required to understand how it operates.
iCAD software documentation provides this guide to you through key contents that can make your experience with the software a lot better, than you would if you were to try it out without any guidance. We strongly recommend that you scan these documents for maximum productivity.
:warning: iCAD is Legally protected software: iCAD is a licensed and copyright protected software under prevailing laws. Please read the End User Licence Agreement (EULA) before installing and using the software. Please DO NOT INSTALL or USE iCAD if you do not agree to the terms of the EULA.
Operating License: Currently iCAD line of products are available only on subscription basis, available by request to www.quanomix.weebly.com or contacting us at:
Quanomic ITES
No 6, Grnd FLR
IT Village/IT Park
Bole Subcity, POBox 170260
Addis Ababa, ETHIOPIA.
You are well come to try the software for a trial period of 1month (extendable to 90days) upon request. We issue trial licenses fot this purpose, and do contact us to get your copy.
Connect with us on LinkedIn to stay up to date.
Write to us quanomix@gmail.com or visit www.quanomix.weebly.com or for any queries you may have. We love to hear from you.

Team Quanomic
System Requirements
iCAD and related software products have the following system requirements. These are the minimum recommended capcity specifications.
- Operating System: Windows 10 or latter
- Architecture: X64
- Processor: Coire i7 or equivalent, or latter
- RAM: 4GB or more
- Screen: FHD (1920x1080), two screens strongly recommended for using AutoCAD side by side.
- AutoCAD: 2018 or latter
Notes: Using on i5 machines is possible, but performance is not guaranteed.
Notes: Using lower screen resolution is possible with additional setting to re-arrange the user interface area - especially for CanalNETWORK product.
Installation and setup guide
Make sure to obtain the correct and recent release of the installation file from your organizations IT dept, or from our website here.
:bulb: Note: The download file size can be large (~2GB). A colleague in your organization may already have it. We recommend to install from a copy, and update as described further below.
Follow below steps to install the applicaiton.
-
To begin installation, right click on the zip file, and extract to a new folder. Then open the created folder and double click on the exe file.
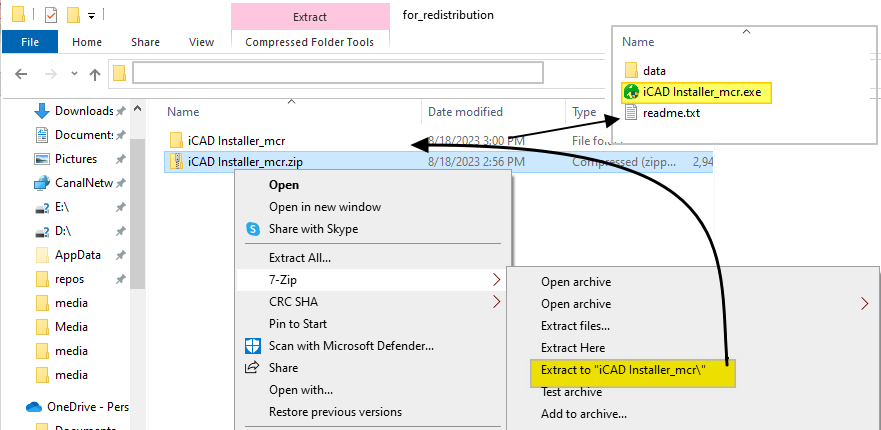
This will start the iLauncher Installer process.
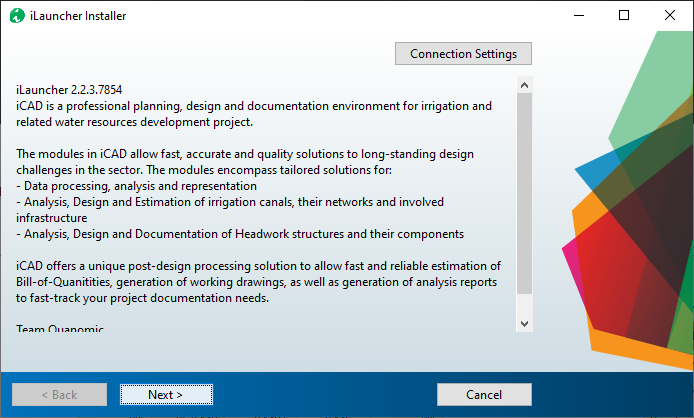
Click the ‘Next` button, to continue.
-
Installer Options: Check the Add Shortcut to Desktop option. It is highly recommended to accept the destination folder.
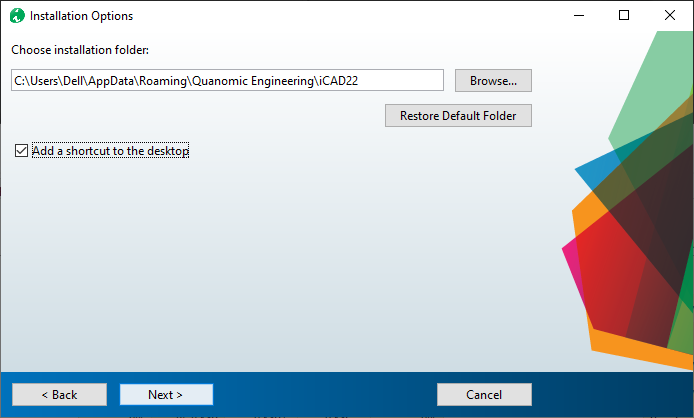 {br}
{br}:exclamation:Note If you choose a differnt location for installation, make sure you have full access previllages to the folder, or the application will not work properly.
-
Required Software: Matlab runtime is a required software, and comes bundled with your installer. Accept to install, and hit
Nextbutton.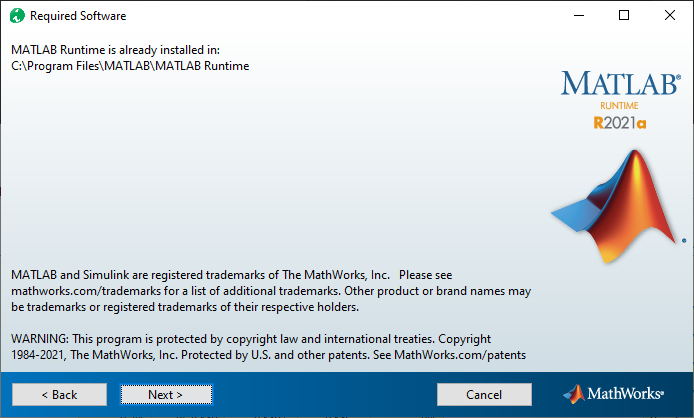 {br}
{br}:bulb: Note: If you have been using previous versions of iCAD or CanalNETWORK product, you might already have the runtim installed. In that case the installer will flag that it is available.
-
Confirmation: Review and accept the installaiton options on this final dialog, and hit
Installto finish.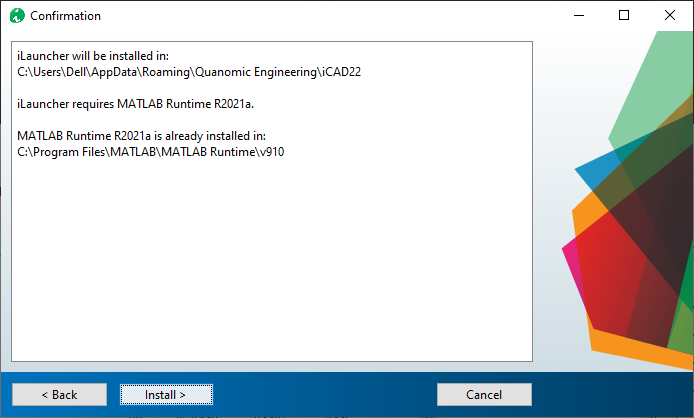 {br}
{br}
This will complete the installation. A short cut should be available on the desktop.
iCAD software is newly released as version 2.8 (Aug 2023) This version must be installed in a users machine. Any and previous versions and components of the software are not supported, and can be uninstalled.
Updating Your Product
Before launching, make sure to setup the application as follows. This will ensure the latest updates are incorporated in your application system:
-
After installation, right-click on the desktop icon, and choose
Properties.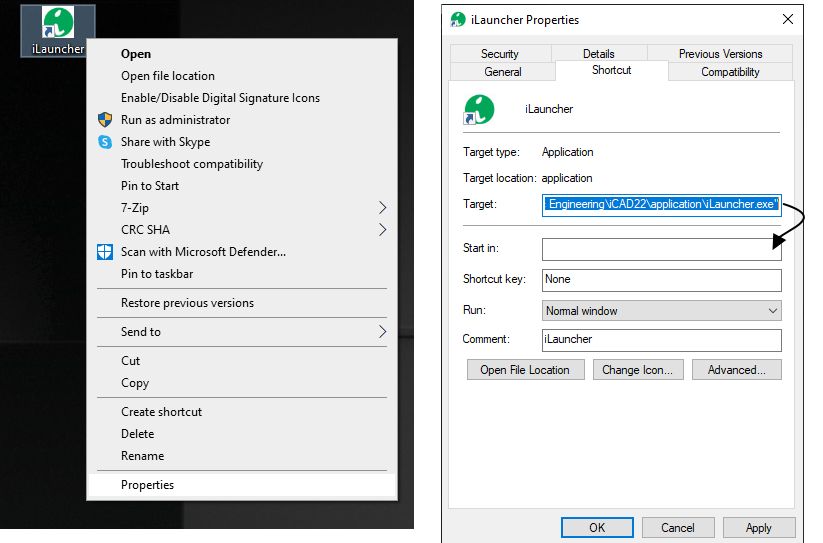
-
In the iLauncher dialog copy the contents in the Target field, and paste to the Start In field.Before completing, remove the last part of the text you pasted iLauncer.exe.
-
Hit
Apply.
Now, you are ready to lauch the application.
:bulb: Tip: Upon startup, the application will require to check and update automatically. If update is not succesful, it may not start.
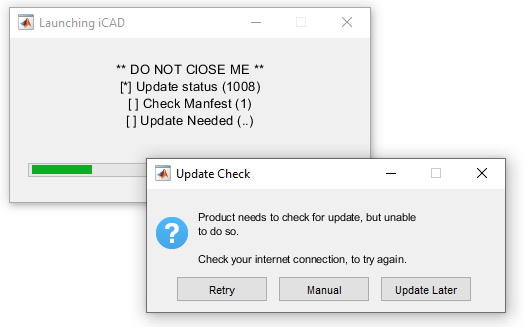
- If the Update Check dialog appears, that is normal. Choose
Update Latterif the option is there, and continue. If not, chooseAbort Launchand exit. Then follow the steps below in Installing Update Resources.
Regular License Check
The license system checks and validates installed licenses with the information registered online. The frequency may vary, but typically between 7 to 10 days. This ensures authorized use of properly maintained products across all user groups and clients.
In this process it is normal to get the following messages every while.

This is only a warning that the system wants to check online, but currently unable to do so. Getting an internet connection and restarting the application will resolve the issue.
If online validation is not done with in the specified number of days, then the application will alert with the validation failed message below.
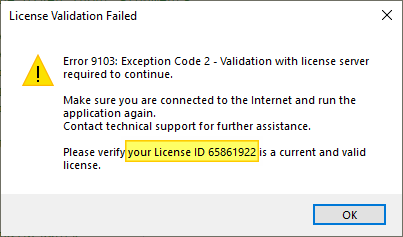 .
.
Connecting to an internet and launching the application will resolve this issue.
Setup AutoCAD for use with iCAD and related products
Upon first start, it is common to get the Failed to Link warning dialog. This happens if a running AutoCAD application is not detected while launching iCAD. That is normal, and continue by hitting Ok button. The application will start.

:bulb: Note: If AutoCAD is running and the above dialog still appears, then the version of AutoCAD may not be supported. Install a supported version, and try again.
If a running AutoCAD application is deteceted, the following dialog appears.
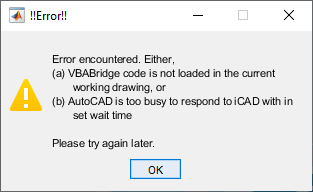
This happens because AutoCAD is not setup yet. Follow below steps to set up AutoCAD.
:bulb: Important Note: The Installed AutoCAD application must be VBA enabled. To check this, and resolve if any issue, go to this Enabling VBA for AutoCAD step first befor continuing.
-
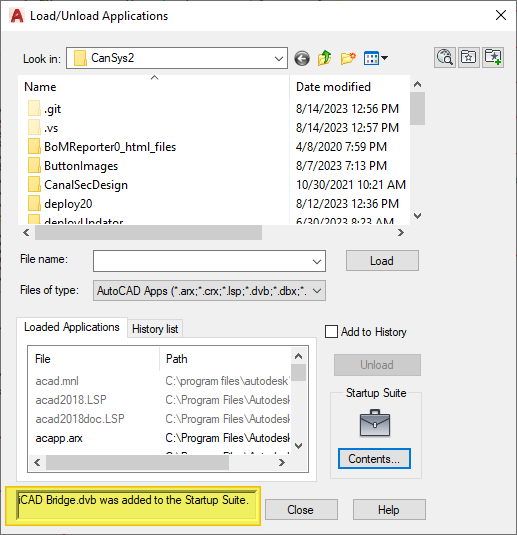
In the open AutoCAD environment, go to the command line and input -appload command. AutoCAD will respond by invoking the Load/Unload Applications dialog.
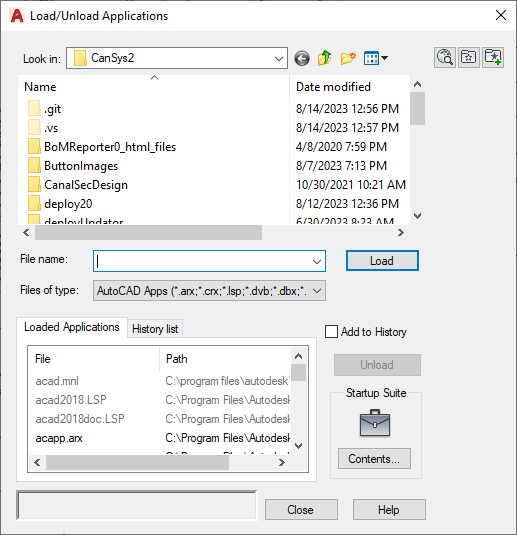
Click on the
Contentsbutton in the Startup Suite pannel. -
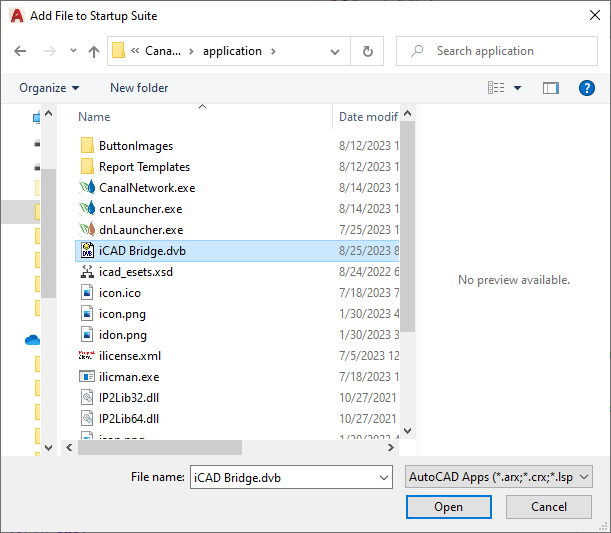
In the startup suite dialog, hot
Addbutton.
-
Navigate to the installation folder (default: C:\Users<username>\AppData\Roaming\Quanomic Engineering\iCAD 22\application), and choose iCAD Bridge.dvb.
-
The Security dialog displays. Choose
Always Loadbutton.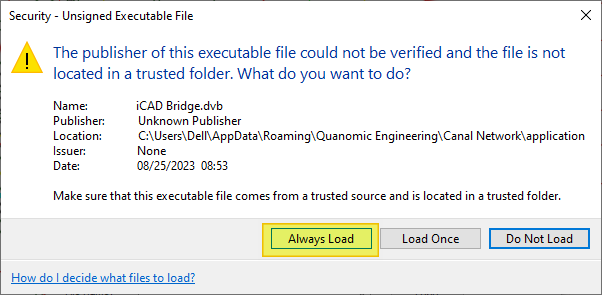
-
The Startup suite dialog now updates its contents listing iCAD Bridge.dvb in the list.
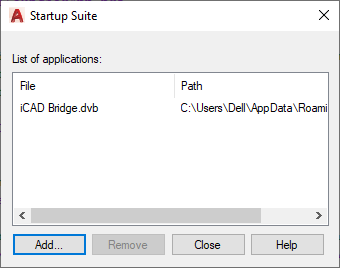
Hit
Closeto finish. -
The Load/Unload Applications dialog confirms the operation at the bottom.
AutoCAD is now set. It will always load this application on startup, and you will not have to do this setup every time.
Note: You can remove and add the bridge applicaiton at any time, with out any inconvenince to your normal workflow.
This setup process insures that, iCAD and related products communicate seamlessly with AutoCAD in every operation.
:warning: Important Note You may continue to get the above error dialog every time you start iCAD application, if you DO NOT setup AutoCAD environement as detailed above.
Installing Update resources
Software updates will be available from time to time. We will release updaes by period. Check for updates is automatically done by your application every once in a while. Where the application prompts there is a new version available, either follow the manual or direct (download and update) methods to update your applciation.
Each update release will have corresponding documetion to let users know what is new, and will ne accessible from the index/home page (click on the Back to Home link at the top of this page).
At any time when using the application, users can check for updates from Help > Updates... menu command, and then choosing Check Online.
If an update is required, we recommend the abort the launcg process, and then follow the below steps.
- Download the Latest update for iCAD Software
- Go to your
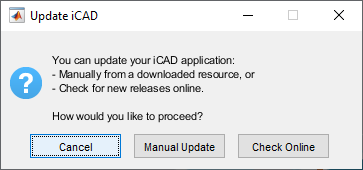
Help > Updates...on your application. ChooseUpdate Manually. This will promot to exit and restart, accept and continue. - On restart, the Launcher application will promot for a method to update. Choose
Manuall Update. - In the file explorer dialog, point to the resource file downloaded above.
:bulb: Note Do not tamper with the naming or content of the resoure file, or update will fail.
Your applicatoin must now be fully updated and working normally.
Licensing Guide
iCAD is a protected by prevailing copyright laws. It is an application provided for use only as described in the license agreement (EULA).
-
The first time you start, or if there is a need to update license info, the system will display the dialog below. Coose Activate iCAD (your version).

-
In the Activation Dialog, select Activate iCAD online.
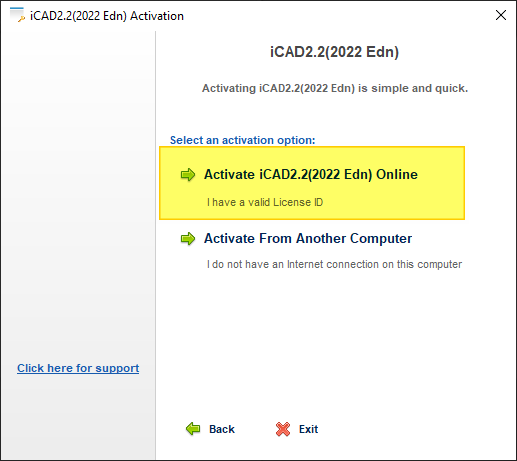
-
Input your license ID and passowrd Information, and hit
Continue.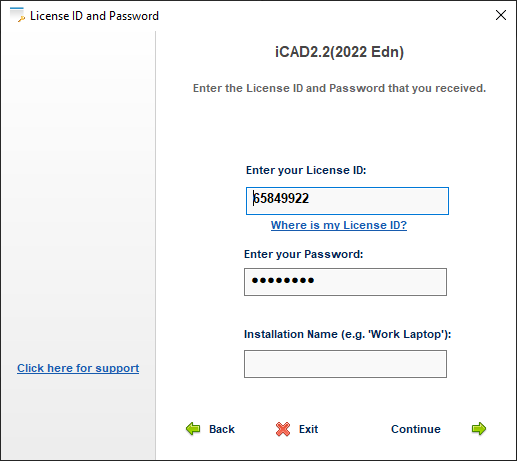
-
The licensing should be succesful, as shown below. Hit
Continueto launch the application.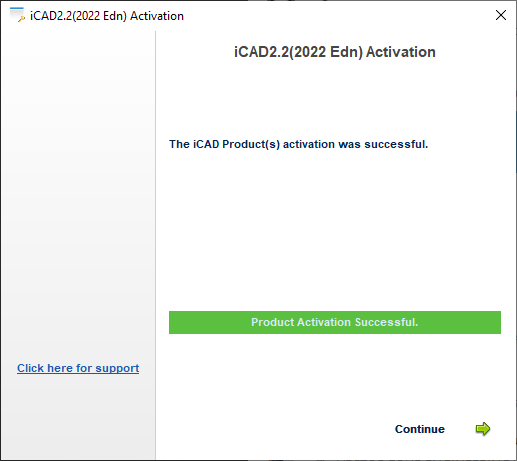
If you have a valid license and get any error, do not hesitate to reach out to us. We will be more than happy to help.
Enabling VBA for AutoCAD
iCAD depends on an Application Interfacing (API) that is built on VBA (Visual Basic for Applications) to interact seamlessly with AutoCAD, and automate users tasks. However, The Visual Basic for Applications (VBA) engine is no longer provided with AutoCAD OEM installation media since
- If you are using AutoCAD versions released in 2010 or latter (2012,14 for example), your AutoCAD installation does not support VB.
To check if your AutoCAD installation is supported by VBA, start AutoCAD and type vbaide on the command prompt. If VBA is embedded, you will see the VB Editor window. Otherwise you will receive an error message such as “Unknown command “VBAIDE”. Press F1 for help.”
Below you will find information to get this engine and install it on your computer.
Visit the AutoDESK official resource website here to locate the right VBA installer for your version of AutoCAD.
After download, follow these steps to install.
-
Close all programs.
-
In Windows Explorer, double-click the downloaded self-extracting EXE file.
-
Unzip the file to the location of your choice, or use the default location.
-
Follow the on-screen instructions.
Upon finish, check again by typing vbaide on the command line of AutoCAD. If insall is succesful, the Editor launches. Close it and continue to AutoCAD setup process above.
END.